SFM Compile Guide How to Render and Export in Source Filmmaker
Creating compelling animations in Source Filmmaker (SFM) is a rewarding process, but rendering your final product can often be one of the most confusing steps. Whether you’re a beginner or someone with experience looking to fine-tune your methods, understanding how SFM compile works is crucial to achieving the best possible results.
This comprehensive guide will walk you through the ins and outs of SFM compile, including how to render and export videos correctly, common mistakes to avoid, and advanced tips to optimize your workflow.
What is SFM Compile?
At its core, SFM compile refers to the process of rendering your animation into a video file using Source Filmmaker. Unlike other animation tools, SFM has a unique rendering pipeline that involves image sequences, session settings, and export configurations. Compiling in SFM essentially turns your project timeline into a high-quality output file that can be used for uploads, presentations, or edits.
Why Understanding SFM Compile Is Important
Knowing how to properly compile in SFM ensures:
- High-quality output with minimal glitches
- Reduced render times through optimized settings
- Better video/audio synchronization
- Smooth playback on all platforms
- Improved editing compatibility for post-production
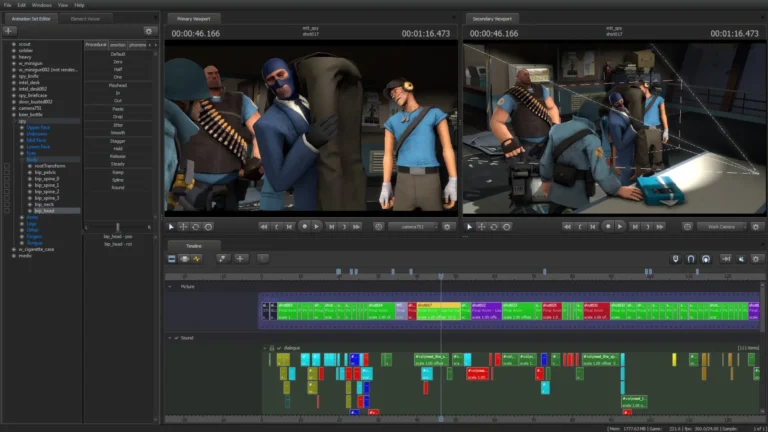
Getting Started with Source Filmmaker
Setting Up Your Project
Before diving into the SFM compile process, it’s essential to set up your project correctly:
1. Create or Open a Session
- Open SFM and either create a new session or open an existing one.
- Save your session in an easily accessible directory.
2. Add Your Models and Animations
- Insert models, maps, lights, and cameras.
- Use the timeline to animate your characters and objects.
3. Set the Shot Length and Frame Rate
- Go to the timeline and define your shot length.
- Standard frame rate is 24 or 30 FPS, depending on your target platform.
The Basics of SFM Compile: Rendering Options
SFM offers two main rendering methods:
1. Image Sequence Rendering
This is the most commonly used method among professionals.
Pros:
- Highest quality
- Lossless output
- Easier to correct individual frames
Cons:
- Requires third-party software to compile into a video (e.g., Adobe Premiere, Vegas, or VirtualDub)
- Larger storage requirements
2. AVI Rendering (Real-Time Rendering)
Faster but less reliable.
Pros:
- One-step process
- No external software needed
Cons:
- Lower quality
- Prone to desynchronization
- Larger file sizes with potential compression issues
Step-by-Step Guide to SFM Compile via Image Sequence
Step 1 – Navigate to Export Menu
- Go to
File > Export > Movie.
Step 2 – Configure Export Settings
File Type
- Select Image Sequence (.tga) for high-quality output.
Output Folder
- Choose a destination folder where all your images will be saved.
Resolution and Frame Rate
- Recommended resolution: 1920×1080
- Frame rate: 24 or 30 FPS
Step 3 – Select Shot or Entire Sequence
- Decide whether to render a single shot or the entire sequence.
Step 4 – Begin Rendering
- Click Export to start compiling frames.
- Rendering time depends on system specs and scene complexity.
Step 5 – Compile Image Sequence into Video
Once you have your frames:
Using VirtualDub (Free Option)
- Open VirtualDub
- Go to
File > Openand select the first frame - Set the frame rate:
Video > Frame Rate - Export to AVI via
File > Save as AVI
Using Adobe Premiere
- Import image sequence
- Set correct frame rate
- Export via Adobe Media Encoder for desired codec
Step-by-Step Guide to SFM Compile via AVI
Step 1 – Go to Export Menu
File > Export > Movie
Step 2 – Choose AVI Format
- Select
.AVIas the file format
Step 3 – Choose Codec
- Use a lossless codec like Lagarith or Huffyuv if available
Step 4 – Render the File
- Click Export and wait for the process to complete
Note: AVI exports can sometimes fail on longer or more complex projects due to memory limitations
Audio Considerations During SFM Compile
Rendering Audio Separately
- SFM often renders video without properly syncing audio
- It’s a good practice to export the audio separately
How to Export Audio
- Go to
File > Export > Sound - Save as
.wavformat - Sync manually in post-production software
Troubleshooting Common SFM Compile Issues
1. Render Crashes Midway
- Reduce scene complexity
- Update your graphics drivers
- Free up system memory
2. Black Screen Output
- Check camera settings
- Ensure render settings are not corrupted
3. Audio Out of Sync
- Always render audio separately
- Match frame rate in your video editor
4. Frame Skipping
- Avoid background processes during rendering
- Use image sequence method for lossless output
Advanced Tips for Efficient SFM Compile
Use Multiple Computers
If you have access to more than one computer, render different shots separately and stitch them together later.
Command-Line Rendering
SFM supports command-line tools for batch rendering. This is especially useful for:
- Automating long render queues
- Saving time on repetitive tasks
Use Compositing for Effects
Render background and foreground separately and composite in post for:
- Faster renders
- Better control over visual effects
Render in 4K
If hardware allows, consider rendering at 4K and downscaling to 1080p for sharper results.
Best Export Formats After SFM Compile
Recommended Formats
YouTube
- Format: MP4 (H.264)
- Resolution: 1080p or higher
- Frame rate: 24, 30, or 60 FPS
Archival
- Format: AVI (Lossless codec)
- Best for storage and future editing
Social Media
- Format: MP4 or MOV
- Square or vertical formats depending on platform
Maintaining Quality During Export
Avoid Over-Compression
- Set a high bitrate (10,000+ kbps) in your video editor
Color Correction in Post
- SFM’s lighting engine isn’t perfect—adjust brightness, contrast, and color in editing software
Backup Image Sequences
- Always keep your original image sequences for future re-renders
Final Thoughts on SFM Compile
Mastering the SFM compile process is essential for any aspiring Source Filmmaker animator. From choosing the right render method to troubleshooting issues and optimizing export settings, each step affects the quality of your final output. By following the guide above, you’ll be able to confidently render and export your animations with professional-grade results.
Whether you’re creating fan animations, short films, or cinematic trailers, understanding how to compile in SFM will set you apart and give your work the polish it deserves.
Are you ready to turn your creative vision into stunning animation? Start compiling today!